[CentOS] 03. SSH 서버 - (1)
카테고리: CENTOS
🔔 SSH에서 가장 설정 변경을 많이 하는 항목
■ SSH 환경 설정파일 경로 : /etc/ssh/sshd_config
| 설정 | 내용 |
|---|---|
| Port | SSH 기본 포트인 22번을 다른 번호로 변경할 때 주로 사용함 |
| PermitRootLogin | Root 계정으로 SSH 접근을 허용할지 여부, 기본적으로 접근 불가함 |
| PasswordAuthentication | 패스워드를 이용한 인증을 허용할지에 대한 여부, 기본적으로 패스워드로 접근임 |
| PubkeyAuthentication | 퍼블릭키를 이용한 인증을 허용할지에 대한 여부, 기본적으로 허용함 |
🔔 패스워드 인증
OpenSSH는 이미 기본적으로 설치되므로 새 패키지를 설치할 필요가 없으며 기본적으로 암호 인증을 사용하여 로그인할 수 있습니다. 그러나 기본적으로 루트 사용자 계정은 로그인이 허용되므로 설정을 변경하는 것이 좋습니다.
■ SSH 서버 - PermitRootLogin 설정
$ vi /etc/ssh/sshd_config


# 43행 : 변경(루트 로그인 금지)
PermitRootLogin no


$ systemctl restart sshd


# 방화벽이 실행 중인 경우 SSH 서비스를 허용(SSH는 [22/TCP]를 사용)
$ firewall-cmd --add-service=ssh

$ firewall-cmd --runtime-to-permanent
■ SSH 클라이언트 - CentOS Stream
$ dnf -y install openssh-clients


$ ssh test@192.168.219.102
The authenticity of host '192.168.219.102 (192.168.219.102)' can't be established.
ED25519 key fingerprint is SHA256:e6/oF5YcPGhSRPOa3So9QhoWYnHjUT78+zrewjVLWj0.
This key is not known by any other names
Are you sure you want to continue connecting (yes/no/[fingerprint])? ^C
[root@localhost ~]# ssh test@192.168.219.101
The authenticity of host '192.168.219.101 (192.168.219.101)' can't be established.
ED25519 key fingerprint is SHA256:e6/oF5YcPGhSRPOa3So9QhoWYnHjUT78+zrewjVLWj0.
This key is not known by any other names
Are you sure you want to continue connecting (yes/no/[fingerprint])? yes
Warning: Permanently added '192.168.219.101' (ED25519) to the list of known hosts.
test@192.168.219.101's password:
[test@localhost ~]$ pwd
/home/test


$ ssh test@192.168.219.101 "cat /etc/passwd"
test@192.168.219.101's password:
root:x:0:0:root:/root:/bin/bash
bin:x:1:1:bin:/bin:/sbin/nologin
daemon:x:2:2:daemon:/sbin:/sbin/nologin
adm:x:3:4:adm:/var/adm:/sbin/nologin
lp:x:4:7:lp:/var/spool/lpd:/sbin/nologin
sync:x:5:0:sync:/sbin:/bin/sync
shutdown:x:6:0:shutdown:/sbin:/sbin/shutdown
...
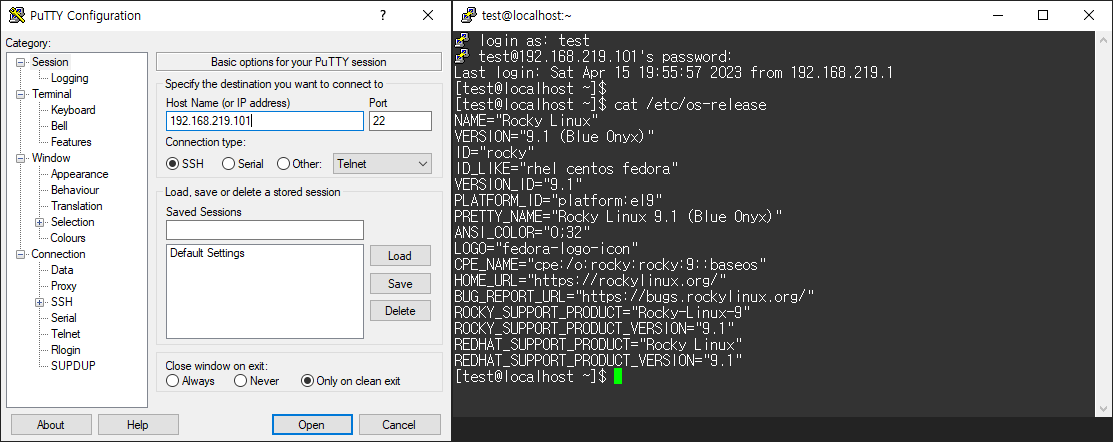
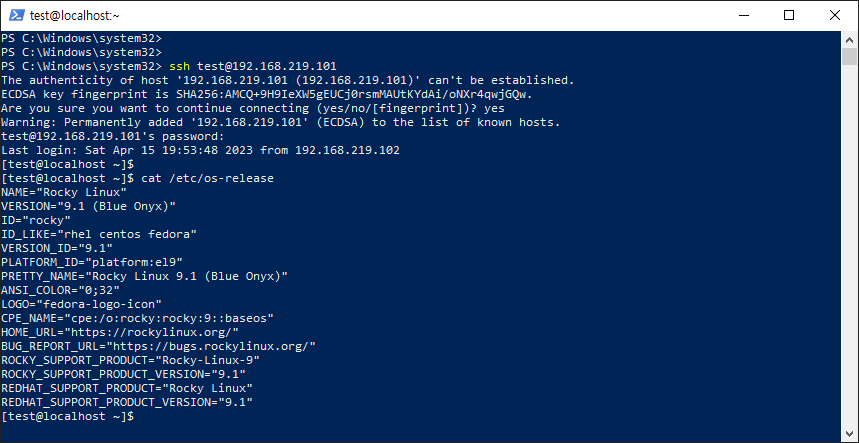
■ SSH 클라이언트 - Windows
🔔 SSH 파일 전송
(a) CentOS - SCP(Secure Copy)를 사용하는 예
# 로컬 호스트의 [test.txt]를 원격 호스트 [node01.test.srv]에 복사
$ scp ./test.txt test@node01.test.srv:~/
test@node01.test.srv's password:
test.txt                                                                      100%   12    23.5KB/s   00:00
# 원격 호스트 [node01.test.srv]의 [/home/rocky/tet.txt]를 localhost에 복사
$ scp test@node01.test.srv:/home/test/test.txt ./test.txt
test@node01.test.srv's password:
test.txt                                                                      100%   12    19.4KB/s   00:00
(b) CentOS - SFTP(SSH File Transfer Protocol)를 사용하는 예
SFTP 서버 기능은 기본적으로 활성화되지만 그렇지 않은 경우 [/etc/ssh/sshd_config]에 [Subsystem sftp /usr/libexec/openssh/sftp-server] 줄을 추가하도록 활성화합니다.
# sftp [Option] [user@host]
$ sftp test@node01.test.srv
test@node01.test.srv's password:
Connected to node01.test.srv.
sftp>

# 원격 호스트의 현재 디렉토리 표시
sftp> pwd
Remote working directory: /home/test

# 로컬 호스트에 현재 디렉토리 표시
sftp> !pwd
/root

# 원격 호스트의 현재 디렉토리에 파일 표시
sftp> ls -l
drwxr-xr-x    2 root     root            6 Apr 15 20:17 html
-rw-r--r--    1 test     test           12 Apr 15 20:08 test.txt

# 로컬 호스트의 현재 디렉터리에 파일 표시
sftp> !ls -l
total 4
-rw-------. 1 root root 1009 Apr 13 00:14 anaconda-ks.cfg
-rw-r--r--. 1 root root    0 Apr 15 20:17 redhat.txt

# 디렉터리 변경
sftp> cd html/
sftp> pwd
Remote working directory: /home/test/html

# 원격 호스트에 파일 업로드
sftp> put redhat.txt redhat_copy.txt
Uploading redhat.txt to /home/test/html/redhat_copy.txt
redhat.txt                                                                    100%    0     0.0KB/s   00:00
sftp> ls -l
-rw-r--r--    1 test     test            0 Apr 15 20:22 redhat_copy.txt

# 원격 호스트에서 파일 다운로드
sftp> get redhat.txt
Fetching /home/test/html/redhat.txt to redhat.txt


# 원격 호스트에 디렉토리 생성
sftp> mkdir testdir
sftp> ls -l
-rw-r--r--    1 test     test            0 Apr 15 20:24 redhat.txt
-rw-r--r--    1 test     test            0 Apr 15 20:22 redhat_copy.txt
drwxrwxr-x    2 test     test            6 Apr 15 20:28 testdir

# 원격 호스트에서 디렉토리 삭제
sftp> rmdir testdir
sftp> ls -l
-rw-r--r--    1 test     test            0 Apr 15 20:24 redhat.txt
-rw-r--r--    1 test     test            0 Apr 15 20:22 redhat_copy.txt

# 원격 호스트에서 파일 삭제
sftp> rm redhat_copy.txt
Removing /home/test/html/redhat_copy.txt
sftp> ls -l
-rw-r--r--    1 test     test            0 Apr 15 20:24 redhat.txt

# ![command]를 사용하여 명령 실행
sftp> !cat /etc/passwd
root:x:0:0:root:/root:/bin/bash
bin:x:1:1:bin:/bin:/sbin/nologin
daemon:x:2:2:daemon:/sbin:/sbin/nologin
adm:x:3:4:adm:/var/adm:/sbin/nologin
lp:x:4:7:lp:/var/spool/lpd:/sbin/nologin
...

# exit
sftp> quit
221 Goodbye.
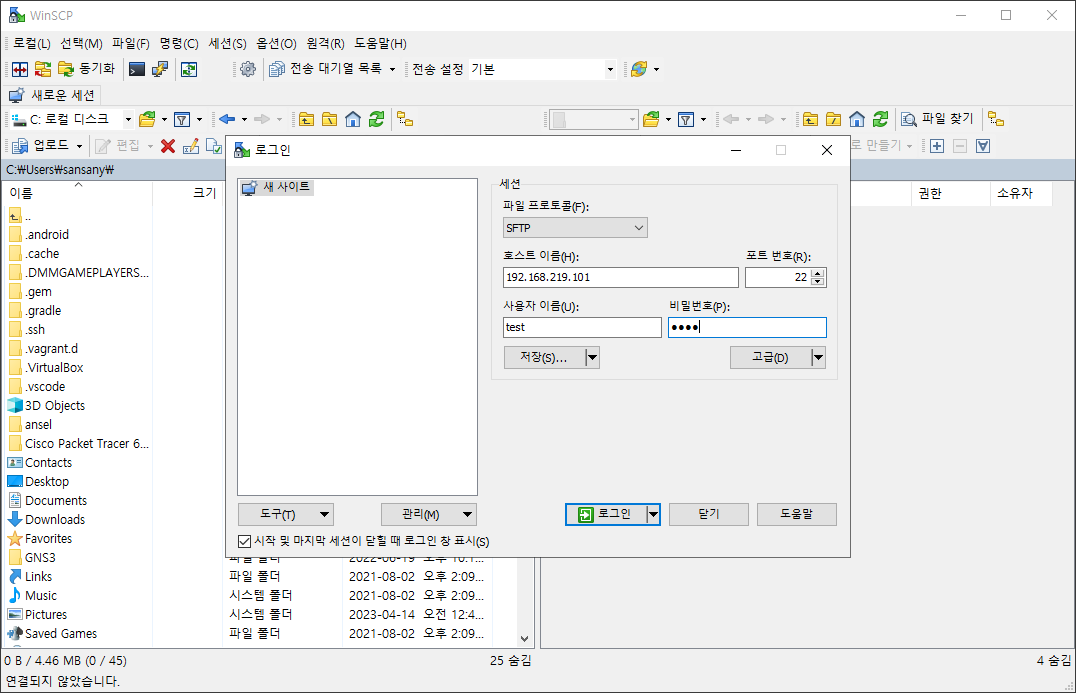
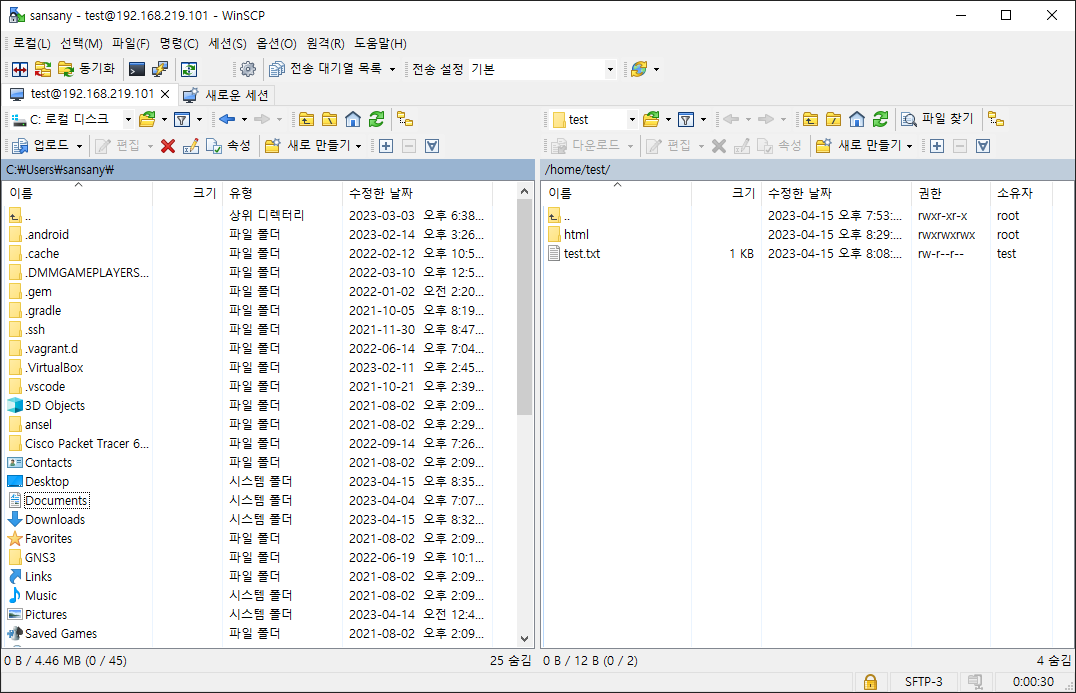
(c) Windows - WinSCP을 사용하는 예
WinSCP 설치 : https://winscp.net/eng/download.php
🔔 SSH 키쌍 인증
(a) CentOS Stream
■ 각 사용자별로 Key-Pair를 생성하여 SSH Server Host에서 일반 사용자와 로그인하고 다음과 같이 작업합니다.
[test@node01 ~]$ ssh-keygen
Generating public/private rsa key pair.
Enter file in which to save the key (/root/.ssh/id_rsa):
Enter passphrase (empty for no passphrase):
Enter same passphrase again:
Your identification has been saved in /root/.ssh/id_rsa
Your public key has been saved in /root/.ssh/id_rsa.pub
The key fingerprint is:
SHA256:ozKozFUZ7RfRyBRSVBOppIRT/EgZt5zHFz7RvTFl5eo root@localhost.localdomain
The key's randomart image is:
+---[RSA 3072]----+
|      ++BB=+oo. B|
|     o.=++=oo o*.|
|     .+.==.o +  =|
|      +o oo . .o |
|     o .S.    .  |
|   ..  ...   .   |
|  ..o .       E  |
|o..  o           |
|.o               |
+----[SHA256]-----+


[test@node01 ~]$ ls -al ~/.ssh
total 16
-rw-------. 1 root root 2610 Apr 15 20:43 id_rsa
-rw-r--r--. 1 root root  580 Apr 15 20:43 id_rsa.pub

[test@node01 ~]$ mv ~/.ssh/id_rsa.pub ~/.ssh/authorized_keys
■ 서버에 작성된 개인 키를 클라이언트로 전송한 후 키 쌍 인증확인으로 로그인할 수 있습니다.
# 개인 키를 로컬 ssh 디렉토리로 전송
[test@node02 ~]$ scp test@node01.test.srv:/home/test/.ssh/id_rsa ~/.ssh/
test@node01.test.srv's password:
id_rsa                                                                        100% 2610     2.3MB/s   00:00

[test@node02 ~]$ ssh test@node01.test.srv
Last login: Sat Apr 15 20:47:30 2023
[test@localhost ~]$
■ ssh-copy-id
-
ssh-copy-id은 원격 서버에 공개 키를 복사하고 설정하는 명령으로 이 명령을 사용하면 원격 서버에 ssh로 접속할 때 암호를 입력하지 않아도 됩니다.
-
이 명령은 로컬 컴퓨터의 공개 키를 원격 서버의 authorized_keys 파일에 추가합니다.
# ssh-copy-id -i <공개 키 파일> <사용자명>@<서버 주소>
[test@node02 ~]$ ssh-copy-id -i ~/.ssh/id_rsa.pub node01.test.srv
/usr/bin/ssh-copy-id: INFO: Source of key(s) to be installed: "/home/test/.ssh/id_rsa.pub"
The authenticity of host 'node01.test.srv (192.168.219.101)' can't be established.
ED25519 key fingerprint is SHA256:e6/oF5YcPGhSRPOa3So9QhoWYnHjUT78+zrewjVLWj0.
This key is not known by any other names
Are you sure you want to continue connecting (yes/no/[fingerprint])? yes
/usr/bin/ssh-copy-id: INFO: attempting to log in with the new key(s), to filter out any that are already installed
/usr/bin/ssh-copy-id: INFO: 1 key(s) remain to be installed -- if you are prompted now it is to install the new keys
test@node01.test.srv's password:

Number of key(s) added: 1

Now try logging into the machine, with:   "ssh 'node01.test.srv'"
and check to make sure that only the key(s) you wanted were added.

[test@node02 ~]$ ssh node01.test.srv
Last login: Sat Apr 15 21:02:06 2023 from 192.168.219.102
(b) Windows 클라이언트에서 SSH 키 쌍 인증
■ 윈도우즈 클라이언트에서 SSH 서버에 로그인하는 예제로, 그 전에 Windows Client에 개인 키를 전송한다.
■ /etc/ssh/sshd_config에서 PubkeyAuthentication 설정
$ cat /etc/ssh/sshd_config | grep Pubkey
PubkeyAuthentication yes
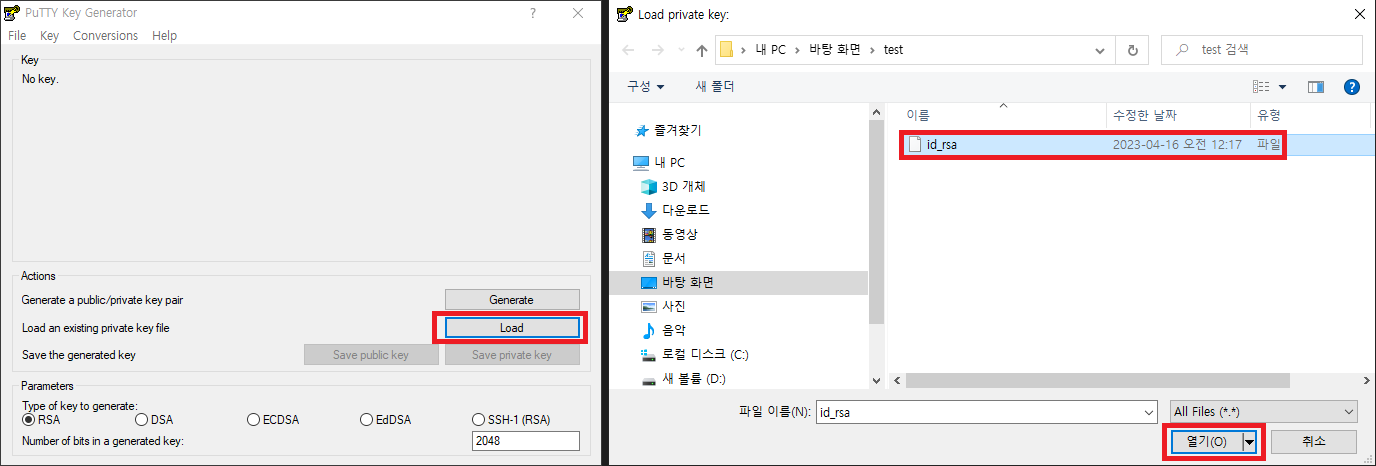
■ [Puttygen.exe]를 실행한 후 다음 창에서 [Load] 버튼을 클릭
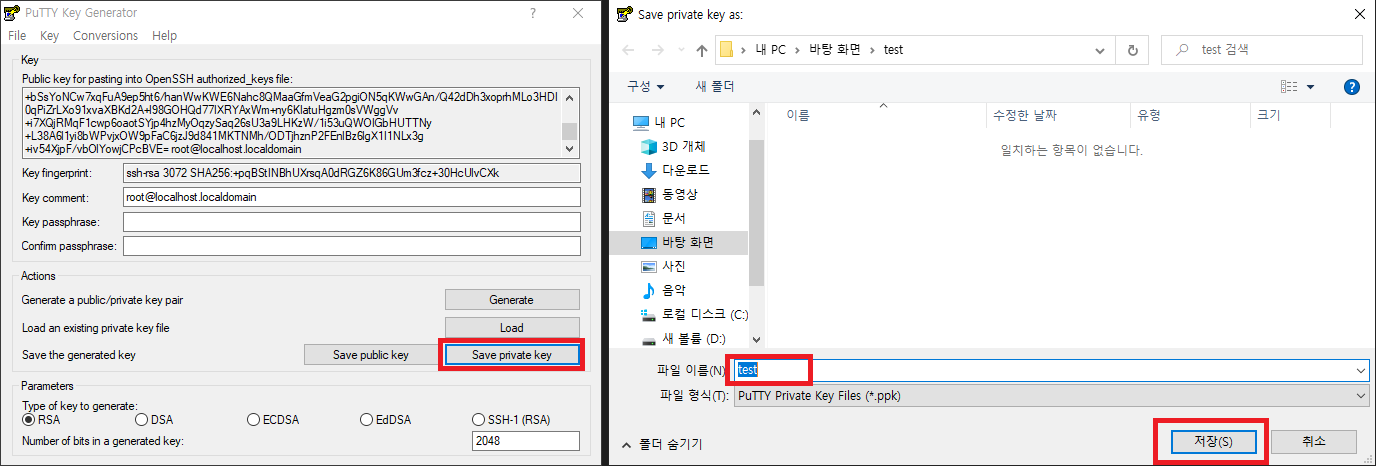
■ [Save private key] 버튼을 클릭하여 원하는 파일 이름으로 원하는 폴더에 저장
■ 서버에 SSH 키 등록 - Puttygen.exe에서 Public Key for pasting … 부분을 복사해서 “.ssh/authorized_keys” 파일에 저장
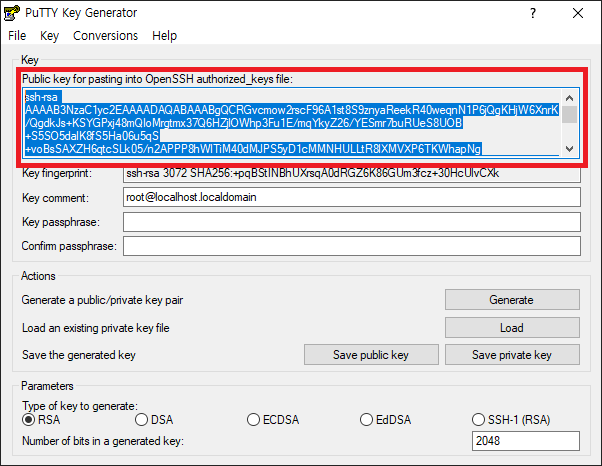
$ vi .ssh/authorized_keys

$ cat .ssh/authorized_keys
ssh-rsa AAAAB3NzaC1yc2EAAAAD....
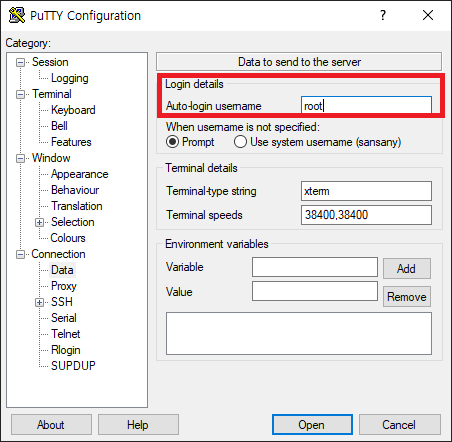
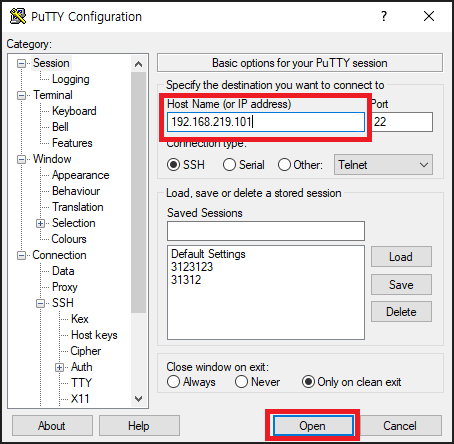
■ Connection > Data > Login-details에서 SSH 키를 설정한 계정을 입력
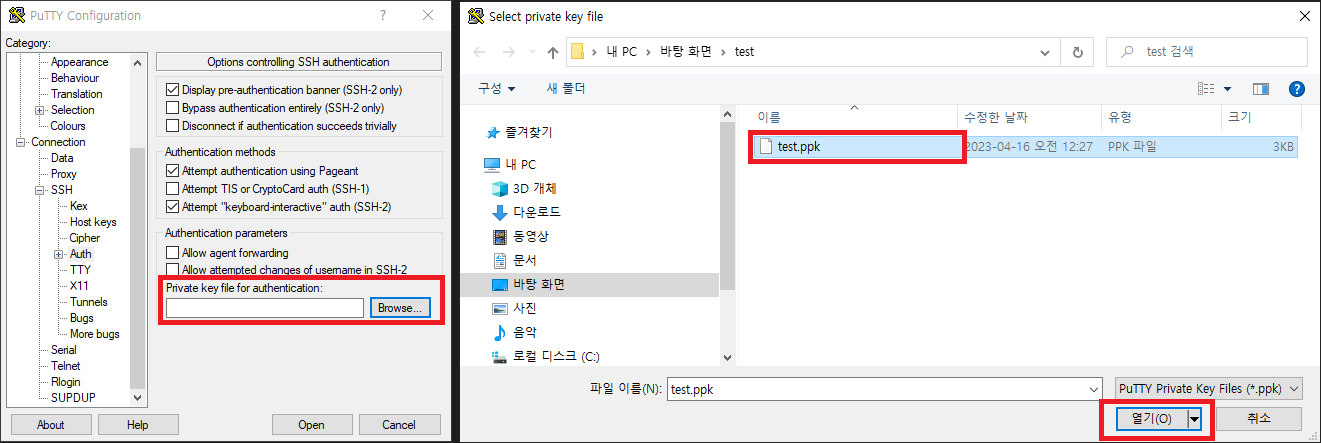
■ Connection > SSH > Auth에서 Private key file for authentication의 Browse 버튼을 클릭 후 Private key를 선택
■ Session으로 돌아와서 (옵션을 Save를 하십쇼) 접속
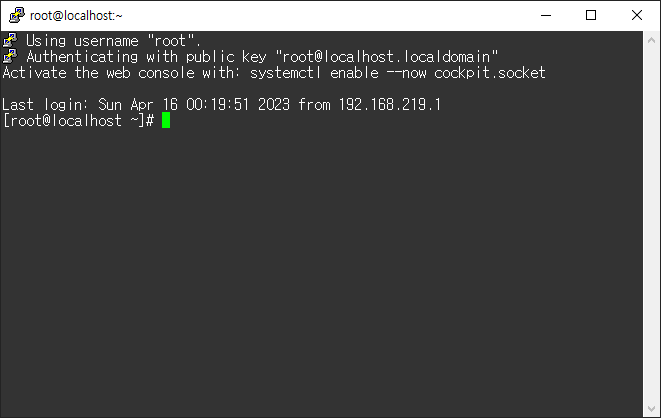
■ 암호 없이 SSH 키로 접속이 되는지 확인
댓글 남기기